Easy knit chunky blanket, how to knit a dishcloth, how to get help in windows 11, directions for making chunky knit blanket, chunky knit blankets, how to knit a chunky cat turtleneck, chunky knit blanket pattern free, how to clear cache, how to knit a scarf, diy chunky knit blanket step by step, how to knit a beanie, how to knit socks, how to knit a headband, how to knit a chunky blanket, how to write a cover letter, how to make a chunky knit blanket.
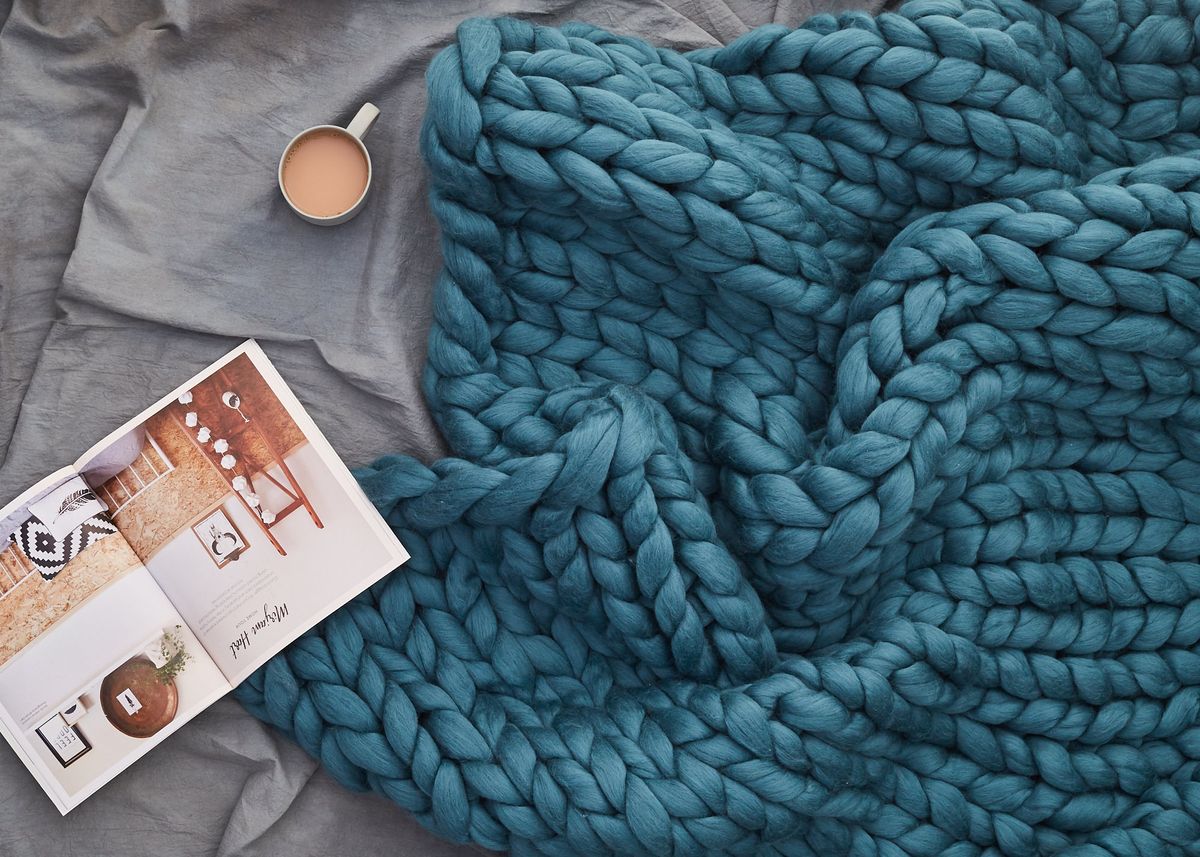
Chunky knit blankets are everywhere vivid now, you don't have to scroll very far above Instagram to see one draped on the end of a bed or thrown over a sofa. Yep, we love them. But what we don't love is conception of having to remortgage our houses to be able to afford one.
So with the help of Wool Couture, we've found a much more budget friendly way to nail the trend and to knit a fleshy blanket just like the one above. Literally all you need is some generous thick wool and your arms. Intrigued? Just follow these 10 simple(ish) steps to master the art of arm knitting...
If you are once more crafty projects we have plenty of ideas over on our hub page.
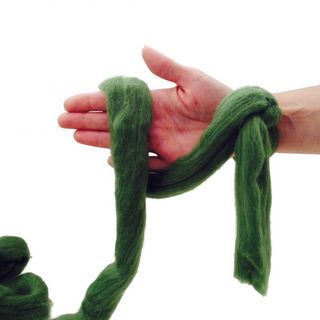
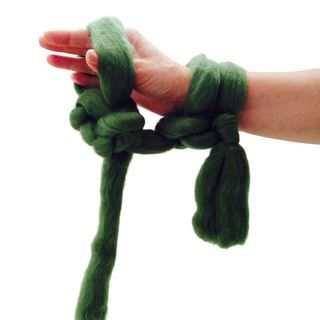
1. Make a slip knot
Lay your yarn across the palm of your hand and hold it with two fingers. Leave 4in hanging below your little finger. Wrap the yarn about your hand.
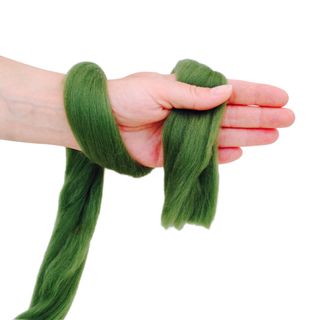
(Image credit: Wool Couture)
2. Bring the yarn through the loop
Turn your hand so that your palm is facing down. With your novel hand, slip your fingers under the first loop and grab the instant loop that attached to the ball of yarn. Bring the yarn ended the loop.
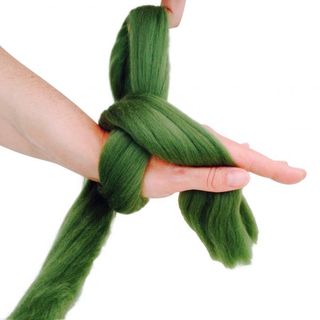
(Image credit: Wool Couture)
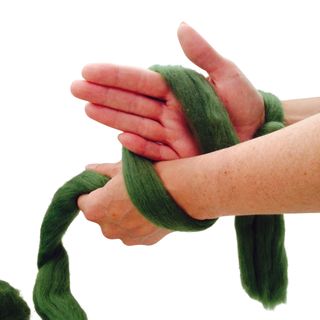
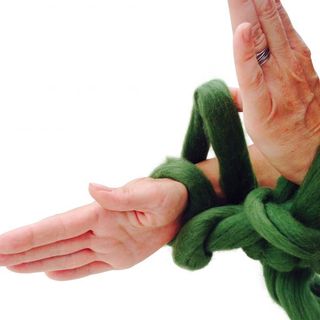
3. Create a slip knot
Slide the yarn off of your hand. You now have forced a slip knot. Place the slip knot over your sparkling wrist and pull tight
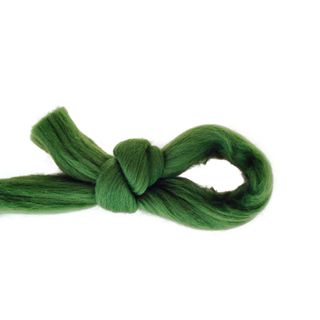
(Image credit: Wool Couture)
4. Cast on
Make a loop with the yarn attached to the ball so that the yarn hangs in clue of your hand.
(Image credit: Wool Couture)
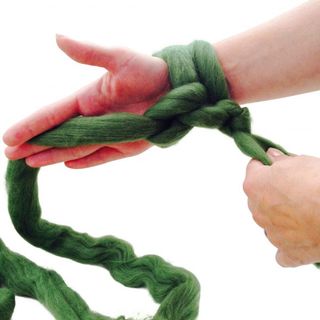
5. Pull through the loop
Put your left hand ended the loop that sits below your little finger. Grab the operational yarn and pull it through the loop. Drop the novel loop off your right-hand fingers and place the new loop on your wrist.
(Image credit: Wool Couture )
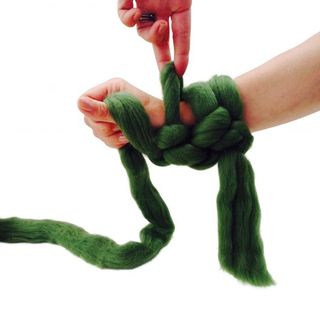
6. Tighten and repeat
Gently pull the working yarn and tail apart to tighten the stitch on your arm. Repeat pending you have cast on the desired number of stitches for your blanket
(Image credit: Wool Couture)
7. Pull the first stitch over your fist
Pick up the yarn attached to the ball and set aside it over your thumb and hold between your fist. Pull the righteous stitch from your right-hand wrist over your fist.
(Image credit: Wool Couture)
8. Complete the rows
Turn the new loop slightly clockwise so the yarn attached to the ball is closest to you. dwelling the new stitch on your left wrist and pull gently on the yarn attached to the ball to tighten the loop on your wrist.
When you have devoted casting on your desired amount of stitches, you will use the same technique to do all of your anunexperienced rows.
For each cast on stitch allow 2.2in. For example, if you want a blanket that is 22in wide, then cast on 10 stitches.
(Image credit: Wool Couture)
9. Knit two stitches
Pick up the first stitch that you knitted and pull it up and over the binary stitch. Drop the stitch off completely over your fingers so that you have one stitch survive. Repeat until you have one stitch left.
10. Finish the chunky blanket
Pull the end of your yarn above the loop and pull to tighten. To neatly hide the strands of yarn left, weave them in and out of each stitch pending they are secure.
(Image credit: Wool Couture)
More on crafting:
Source


